Now Reading: How to Remove Wallpaper Glue: A Step-by-Step Guide for Smooth Walls
-
01
How to Remove Wallpaper Glue: A Step-by-Step Guide for Smooth Walls

Introduction: Why Removing Wallpaper Glue Matters
Removing old wallpaper is only half the battle. Leftover residue can ruin your next home improvement project. Proper wallpaper glue removal ensures your walls are ready for a fresh look.
The Importance of a Clean Surface
Ensuring proper paint adhesion
Residual glue creates a bumpy texture under new paint. It prevents the paint from bonding correctly to the drywall surface. This often leads to peeling or cracking over time.
Preventing issues with new wallpaper installation
Old adhesive can react with the moisture in new wallpaper paste. This reaction causes bubbles or prevents the new paper from sticking. A clean wall provides the best foundation for new coverings.
Achieving a professional, aesthetic finish
Invisible glue spots often show up once you apply a finish. These imperfections ruin the smooth look of your home renovation. Cleaning the walls thoroughly delivers a high-quality, professional result.
What to Expect from This Guide
Step-by-step instructions for various methods
This guide provides clear steps for several effective cleaning methods. You will learn how to handle different types of adhesive residue. These instructions make the process manageable for any DIY enthusiast.
Essential tools and material recommendations
We include a full list of necessary tools and materials. Having the right equipment saves you time and reduces physical effort. You can choose the tools that fit your specific budget.
Troubleshooting common challenges
Stubborn glue can be frustrating to remove from old plaster walls. We offer tips to solve common issues during the cleaning process. These strategies help you overcome obstacles without damaging your home.
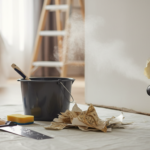
Before You Begin: Essential Preparations
Preparation is the most important part of any home improvement task. Taking time to set up prevents accidents and protects your property. Follow these steps to ensure a smooth and safe project.
Safety First: Protecting Yourself
Wearing protective gloves and eyewear
Chemical strippers or hot water can irritate your skin and eyes. Always wear heavy-duty gloves and safety glasses during the process. This protection keeps you safe from splashes and sharp scrapers.
Ensuring adequate ventilation
Keep windows open to maintain a steady flow of fresh air. Good ventilation helps dissipate fumes from cleaning solutions and damp walls. It also helps the room dry faster after you finish.
Donning old clothes to protect against mess
Removing wallpaper glue is a messy job involving water and sticky residue. Wear old clothes that you do not mind getting dirty or stained. This choice allows you to focus on the work without worry.
Protecting Your Room and Furniture
Laying down drop cloths or plastic sheeting
Water and glue can easily damage your flooring or carpets. Lay down waterproof drop cloths or thick plastic sheeting before you start. Secure the edges with painter’s tape to prevent any liquid seepage.
Taping off trim and electrical outlets
Cover all baseboards and trim with high-quality painter’s tape for protection. Use plastic to cover electrical outlets and light switches in the room. This step prevents moisture from entering your home’s electrical system.
Moving or covering furniture
Move all furniture to the center of the room or another area. Cover any remaining large items with plastic sheets to keep them clean. Clearing the space gives you more room to move your ladder.
Turning off power to outlets and switches
Safety requires turning off the power to the room at the breaker. Working with water near electrical outlets creates a significant safety risk. Always verify the power is off before applying any liquid solutions.
Gathering Your Tools and Materials
Scrapers (plastic and metal)
You will need both plastic and metal scrapers for this project. Plastic scrapers protect the wall, while metal ones handle the toughest glue. Keep both handy to tackle different levels of adhesive buildup.
Spray bottle
A simple spray bottle is perfect for applying your cleaning mixture. It allows you to target specific areas without soaking the entire wall. This tool helps control the amount of moisture you use.
Buckets and sponges
Keep several buckets and sponges ready for washing and rinsing the walls. Use one bucket for the cleaning solution and another for fresh water. Clean sponges ensure you are not just spreading the glue around.
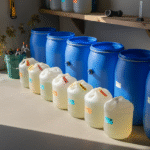
Cleaning solutions (dish soap, white vinegar, commercial stripper)
Common household items like dish soap and white vinegar work very well. You may also need a commercial stripper for very old or thick glue. These solutions break down the adhesive bond for easier scraping.
Wallpaper steamer (optional)
A wallpaper steamer is a great tool for large or difficult projects. The heat quickly softens the glue without the need for many chemicals. Consider renting one if you have multiple rooms to clean.
Ladder or step stool
Use a sturdy ladder or step stool to reach the upper walls. Ensure the ladder is stable on the floor before you climb up. Having height access makes the wallpaper glue removal process much safer.
Step-by-Step Methods for Effective Glue Removal

Removing old adhesive is a vital step when learning how to remove wallpaper glue from your walls. These methods will help you achieve a smooth surface for your next home improvement project.
Method 1: Hot Water and Dish Soap Solution (DIY Friendly)
Mixing the solution
Fill a large bucket with very warm water and add a few drops of liquid dish soap. Stir the mixture gently to create a mild sudsy solution that breaks down light adhesives.
Application technique
Apply the soapy water to the wall using a spray bottle for even coverage or a sponge. Work in small sections to ensure the wall stays wet while you handle the glue.
Allowing adequate soaking time
Let the solution sit on the wall for at least ten to fifteen minutes before you start. This waiting period allows the water to penetrate and soften the dried wallpaper glue effectively.
Gentle scraping tips
Use a plastic putty knife to scrape the softened residue away from the wall surface. Keep the blade at a low angle to avoid gouging the drywall or plaster underneath.
Repeating the process if necessary
Some areas may require a second application of the soapy water to remove all the sticky residue. Continue the process until the wall feels completely smooth and free of any tacky spots.
Method 2: Vinegar Solution for Tougher Glue
Preparing the vinegar-water ratio
Mix equal parts of white vinegar and warm water for a more potent cleaning solution. You can use a one-to-two ratio if the glue is relatively thin and easy to move.
Application and soaking process
Spray the vinegar solution onto the glue and let it sit for several minutes to dissolve bonds. The natural acidity of the vinegar helps break down the chemical structure of the old adhesive.
Scraping and wiping clean
Scrape the loosened glue off the wall and wipe the area with a clean, damp cloth. Ensure you remove all vinegar traces so they do not interfere with your future paint layers.
Benefits as an eco-friendly option
Vinegar is a non-toxic and biodegradable choice for homeowners who want to avoid harsh chemical fumes. It is an affordable household staple that makes how to remove wallpaper glue safe and simple.
Method 3: Commercial Wallpaper Strippers (For Stubborn Adhesives)
Understanding different types of strippers
Commercial strippers come in liquid or gel forms designed to tackle the most stubborn wallpaper glues. Gels are often easier to use because they cling to the wall without dripping onto floors.
Strictly following product instructions
Always read the manufacturer’s label to determine the exact contact time required for the product to work. Applying the stripper incorrectly can lead to poor results or damage to your wall surfaces.
Emphasizing safety precautions and proper ventilation
Wear rubber gloves and safety goggles to protect your skin and eyes from chemical splashes. Open your windows to maintain fresh airflow while you work with these potent removal products.
Disposal guidelines
Dispose of used rags and leftover stripping chemicals according to your local hazardous waste regulations. Never pour chemical strippers down the drain as they can harm the plumbing and environment.
Method 4: Using a Wallpaper Steamer (Fast & Efficient)
Steamer setup and operation
Fill the steamer reservoir with clean water and wait for the unit to reach operating temperature. Most machines take about ten to fifteen minutes to produce a steady flow of hot steam.
Technique for effective steaming and scraping
Hold the steam plate against the wall for several seconds to inject heat into the glue. Scrape the softened adhesive away immediately while the section is still hot and moist for best results.
Safety considerations with hot steam
Wear long sleeves and heat-resistant gloves to protect yourself from accidental burns or hot water drips. Be careful not to hold the steam plate in one spot for too long on drywall.
Benefits and potential drawbacks
Steamers are incredibly fast and do not require chemicals, making them ideal for large rooms. However, they can be expensive to buy and might require a learning curve for new users.
Post-Removal: Cleaning and Preparing Your Walls
After the wallpaper is gone, you must address the remaining adhesive. Proper cleaning ensures your new paint or paper adheres perfectly to the surface.
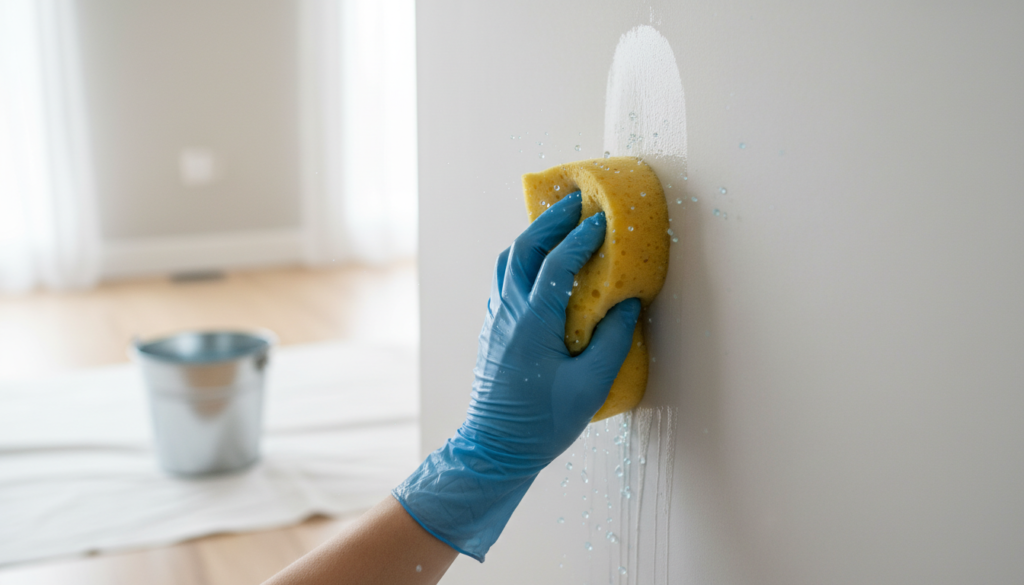
Removing Residual Glue and Residue
Begin with a final rinse using a sponge and clean, warm water. This step helps dissolve any thin layers of paste left behind.
Wipe the walls thoroughly to check for any lingering stickiness or film. Use your hand to feel for rough patches across the entire surface.
Ensure every trace of adhesive is gone before you allow the wall to dry. Residual glue can cause new paint to crack or peel over time.
Inspecting and Repairing Walls
Examine the bare surface for gouges, small holes, or tears in the drywall. Removing old paper often reveals hidden damage or creates new imperfections.
Patch any holes with a high-quality spackling compound and let it dry completely. Sand the areas smooth until they blend seamlessly with the surrounding wall.
Apply a suitable primer to create a uniform base for your next project. Priming prevents stains from bleeding through and helps the new finish last longer.
Troubleshooting Common Wallpaper Glue Removal Challenges
Removing old adhesive can sometimes present unexpected hurdles for many DIY enthusiasts. Use these practical solutions to overcome common wallpaper glue removal difficulties.
Dealing with Stubborn Patches
If some areas refuse to budge, try re-wetting them with your chosen solution. Allow the mixture to soak for several extra minutes to penetrate the glue.
Apply slightly more pressure with your scraper while being careful not to gouge. Move the tool slowly to lift the softened residue from the surface.
Try a more aggressive commercial remover if your initial homemade solutions fail. Some older adhesives require stronger chemical agents to break their bond effectively.
Patience and persistence are your best tools when facing difficult sections of glue. Rushing the process often leads to unnecessary wall damage and extra repair work.
Avoiding Wall Damage
Use plastic scrapers instead of metal ones to protect delicate wall surfaces. Plastic blades are less likely to dig into the soft drywall paper.
Hold your scraper at a shallow angle to prevent the corners from gouging. This technique allows you to slide under the glue without harming the wall.
Know when to stop scraping and re-apply your removal solution to the area. Forcing dry glue off the wall will almost certainly cause surface damage.
Considerations for Different Wall Surfaces
Plaster walls are more durable than drywall but can absorb significant amounts of moisture. Be mindful of how much water you use during the process.
Painted surfaces under the glue may require different handling than bare drywall. Paint can sometimes act as a barrier, making the glue harder to reach.
Old homes often feature unique wall materials that require extra care and attention. Always test your cleaning solution on a small, inconspicuous area first.
Conclusion: Smooth Walls, New Beginnings
Completing the wallpaper glue removal process marks the start of a fresh interior. Your hard work creates a professional foundation for any decorative finish you choose.
Recap of Key Steps for Success
Thorough preparation is the most important part of any successful home renovation project. Taking the time to protect your floors saves hours of cleaning later.
Choosing the right removal method ensures the job stays manageable and efficient. Match your tools and solutions to the specific type of adhesive present.
Meticulous cleaning and repair work guarantee a smooth surface for your new look. Never skip the final inspection before you begin the painting phase.
Enjoy Your Freshly Prepped Walls
Your walls are now ready for a fresh coat of vibrant paint. The smooth surface will showcase the color without any unsightly bumps or textures.
The clean surface is also perfect for a new wallpaper installation if desired. Modern patterns will adhere better to a properly cleaned and primed wall.
You now have a clean slate for any decorative finish you can imagine. Enjoy the satisfaction of a job well done in your refreshed living space.